
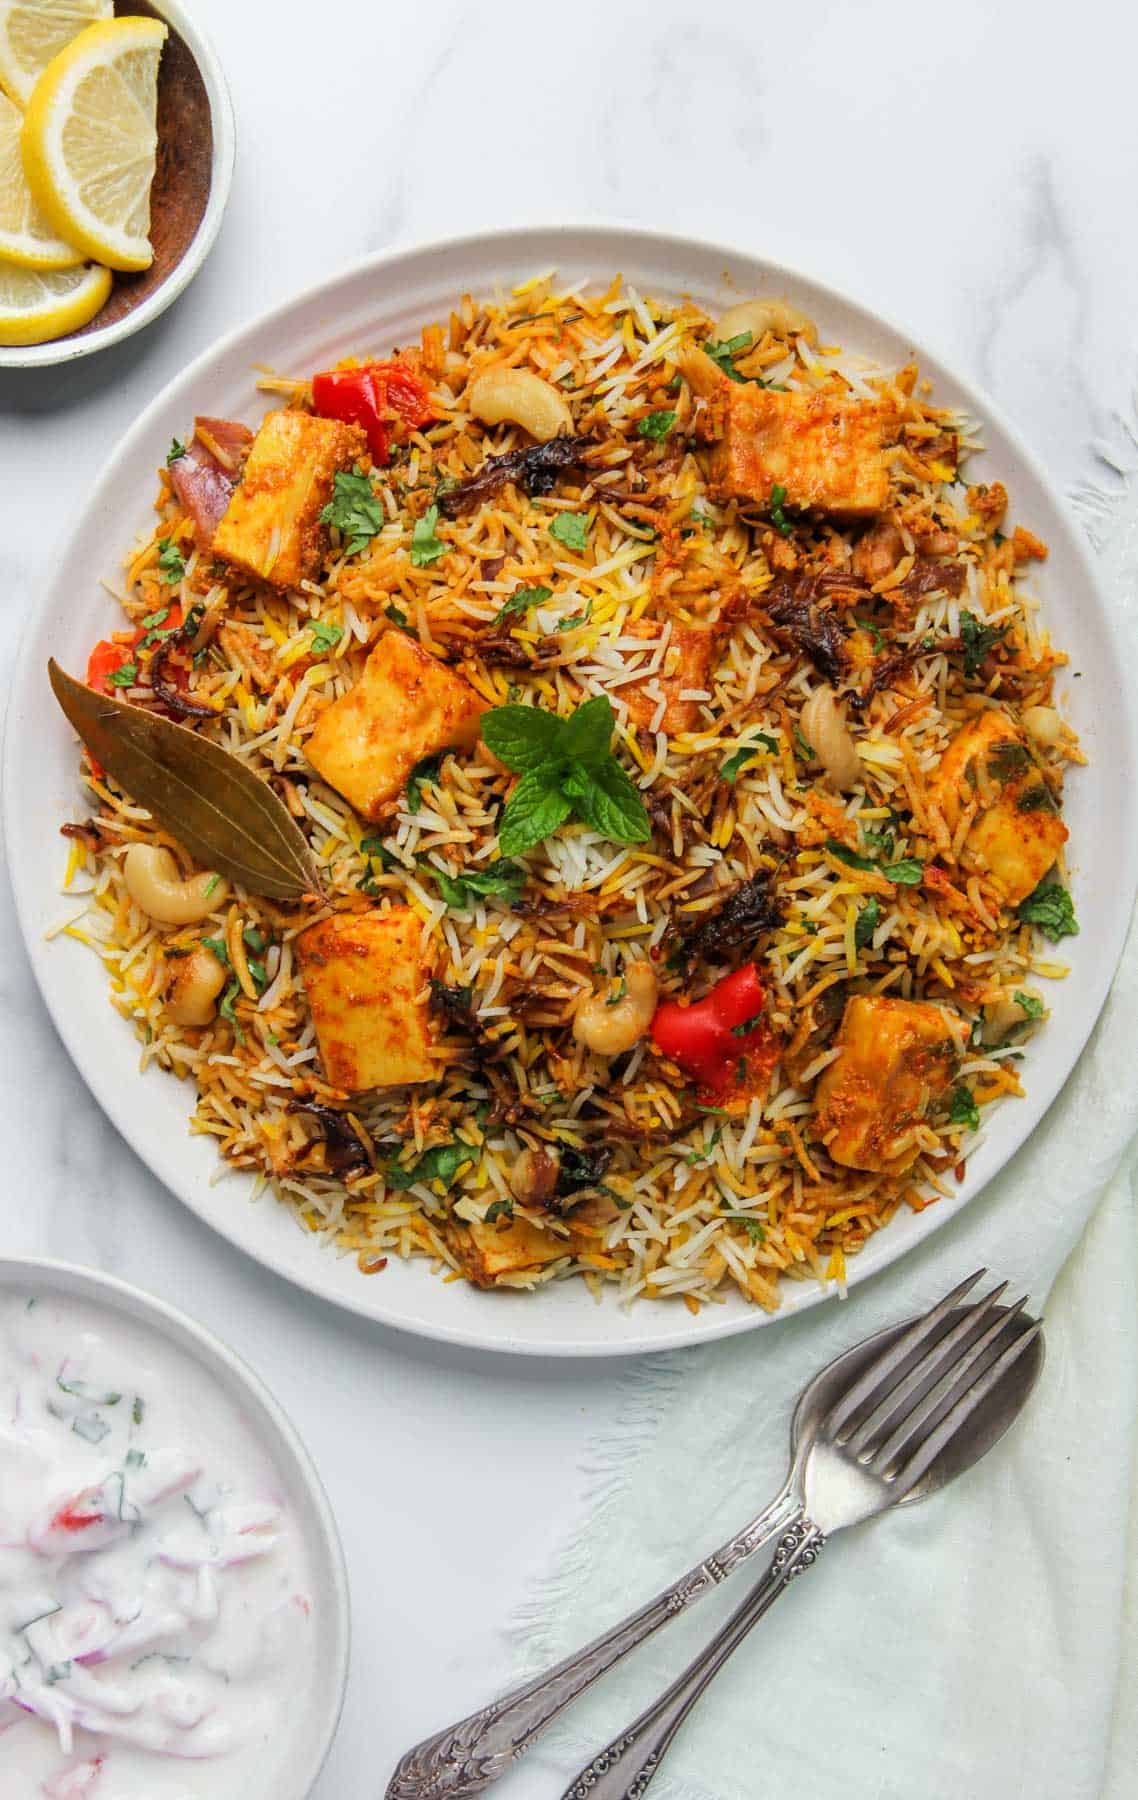
Paneer Biryani is a super satisfying vegetarian meal with aromatic, fluffy basmati rice and pillowy soft chunks of flavorful paneer marinated in warming spices. Garnished with caramelized onions, saffron-infused milk, and herbs, this gluten-free meal is perfect for everyday as well as special occasions.
My Instant Pot Paneer Biryani has been super popular since I published it 6 years ago. The simpler take on the traditional stove top recipe, the Instant Pot version, made it possible to cook Biryani in one pot and with a fraction of the time.
I am grateful to each one of you who has tried it and made it part of your family dinner table. Over the years, I have received many requests for a stovetop paneer biryani recipe, and I am super excited to finally share it.
In this recipe, I am sharing detailed steps with all of my tips to make Paneer Biryani using the traditional stovetop method – from marinating paneer to making the crispy golden fried onions and cooking fluffy rice to perfection so each grain is separate. And lastly, how to make the final layer of garnish so the final dish looks colorful with authentic taste!

Ingredient Notes
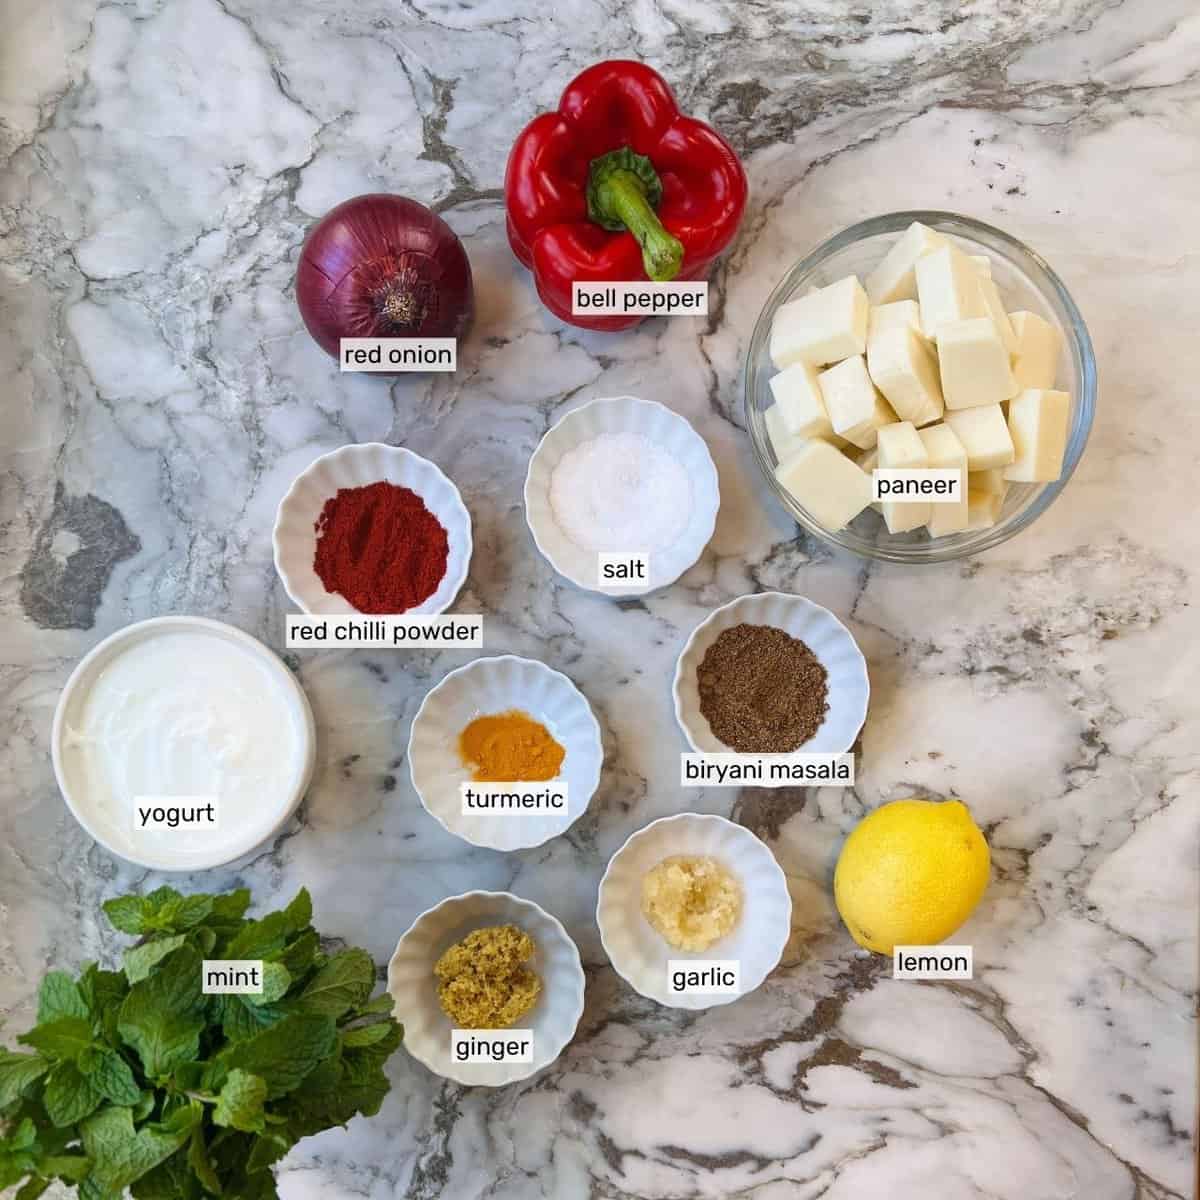
Marinating
- Paneer – homemade paneer or store-bought paneer works. If you have frozen paneer, make sure to thaw it before. Gopi Paneer and Sach Paneer are some of my favorite Paneer brands. They are available in Indian grocery stores as well as at some Costco and Whole Foods.
- Vegetables – red onion and bell pepper add a nice pop of color as well as texture to the Biryani. You can also use veggies like green beans, mushrooms etc.
- Yogurt – plain whole milk or low-fat milk yogurt is perfect for marinating.
- Ginger and Garlic – homemade fresh ginger paste and garlic paste add an authentic taste and aroma to the biryani.
- Ground Spices – red chili powder, turmeric, and biryani masala add perfect aroma and warmth to the dish. I love Kashmiri red chili powder as it adds a vibrant orange hue to the marinade without adding too much heat.
- Lemon and Mint – freshly squeezed lemon juice adds tangy flavors and balances the spicy flavors while fresh mint adds authentic flavors and is a great way to incorporate some herbs in this dish.
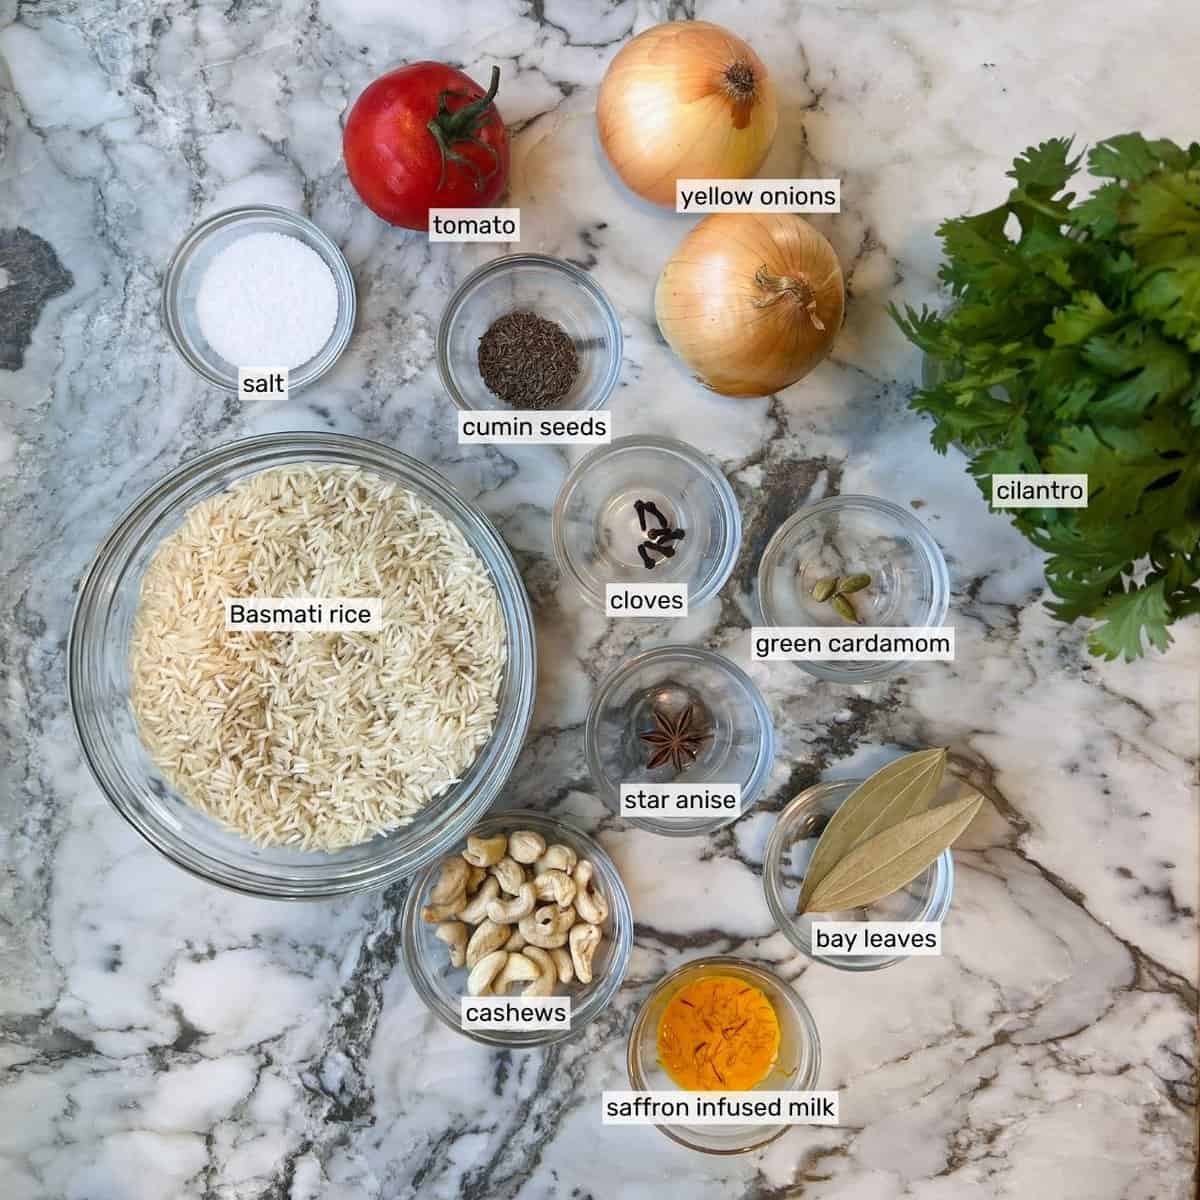
Rice, Aromatics, Spices
- Basmati Rice – Good quality, aromatic, and aged long grain Basmati rice is essential for making Biryani. I always keep Kohinoor extra long grain Basmati rice and Laxmi extra long Basmati rice in my pantry. These are available at most Indian grocery stores in the US. Both brands offer aged rice that is beautifully fragrant and holds its shape when cooked right.
- Onions – yellow onions fried golden-crisp are a must in Biryani as well as a garnish on top. Make sure to slice the onions thinly so they cook faster. The onions will be soft when you take them out of the hot ghee, but will crisp up as they cool down.
- Ghee – a must for nutty taste, the ghee is used to fry onions as well as to cook the biryani
- Tomato – pureed ripe tomato makes a tangy base for the paneer to cook.
- Whole Spices – black cumin seeds (shah jeera), cloves, star anise, green cardamom, and bay leaves are infused in the hot water used to cook the rice.
- Saffron – infused in milk, saffron adds a pop of yellow color to the rice.
- Cashews – optional garnish. Fry whole raw unsalted cashews in ghee until lightly golden or you can also pop them in the air fryer at 300 F for 4 minutes.
How to Make Paneer Dum Biryani
Here is a step-by-step recipe with photos showing how to make perfect biryani.
1: Marinate the Paneer
Start by marinating the paneer. Make sure to use fresh spices, herbs, and good-quality paneer.
I have used homemade biryani masala in this recipe but you can also use store-bought. Garam masala is also a good substitute if that is what you have on hand.

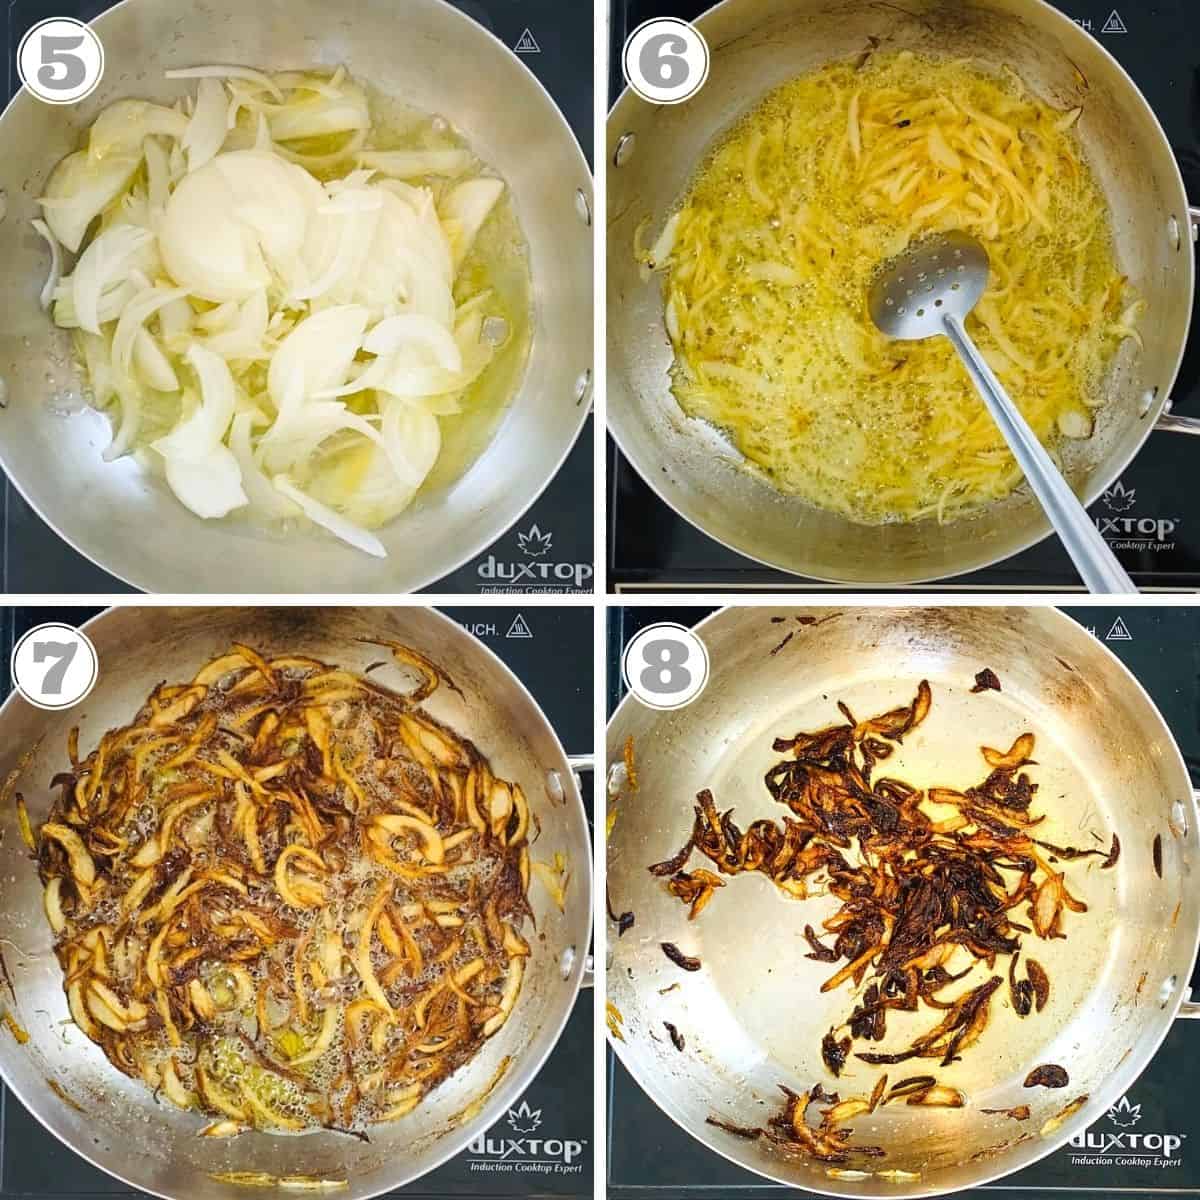
2. Make crispy fried onions
I prefer to shallow fry onions in lesser ghee instead of deep frying them. You can choose either method and use oil instead of ghee. Just make sure to stir them constantly and turn the heat off once they start to become golden brown, as they will continue to cook even after the heat is turned off.
Reserve half of the onions for garnish and cook the marinated paneer in the remaining half.
3: Parboil the rice
Rinse the rice a few times and then soak it in water for 20 minutes. Drain again.
Cook the rice in boiling water infused with whole spices. It should be only partially cooked, as it will finish cooking when the biryani is “dum” cooked (slow-cooked in a sealed pot).
Drain the rice and reserve.

4: Layering
Saute the marinated paneer in the pot with leftover crispy onions along with pureed tomatoes. Make sure to saute only until everything is just heated through. Do not overcook the paneer.
Gently layer partially cooked rice over the paneer and veggies. You may choose to take out half of the paneer and veggies, layer over half of the rice, and then repeat with the other half of the paneer and rice.
Add the garnish layers – saffron-infused milk, reserved caramelized onions, and golden fried cashews.

5: Seal and slow cook AKA “Dum”
Seal the lid tightly by securing aluminum foil around the lid to prevent any steam from escaping the pot. You can also put something heavy like a pestle on the lid.
Cook on the lowest heat. This method of slow cooking is also known as “Dum” and hence the term Dum Biryani.
Allow the Biryani to rest for at least 10 minutes with the lid closed before serving.

How to Serve Paneer Biryani
Gently fluff the rice without mixing it too much. This will prevent the grains from breaking, especially when the rice is hot.
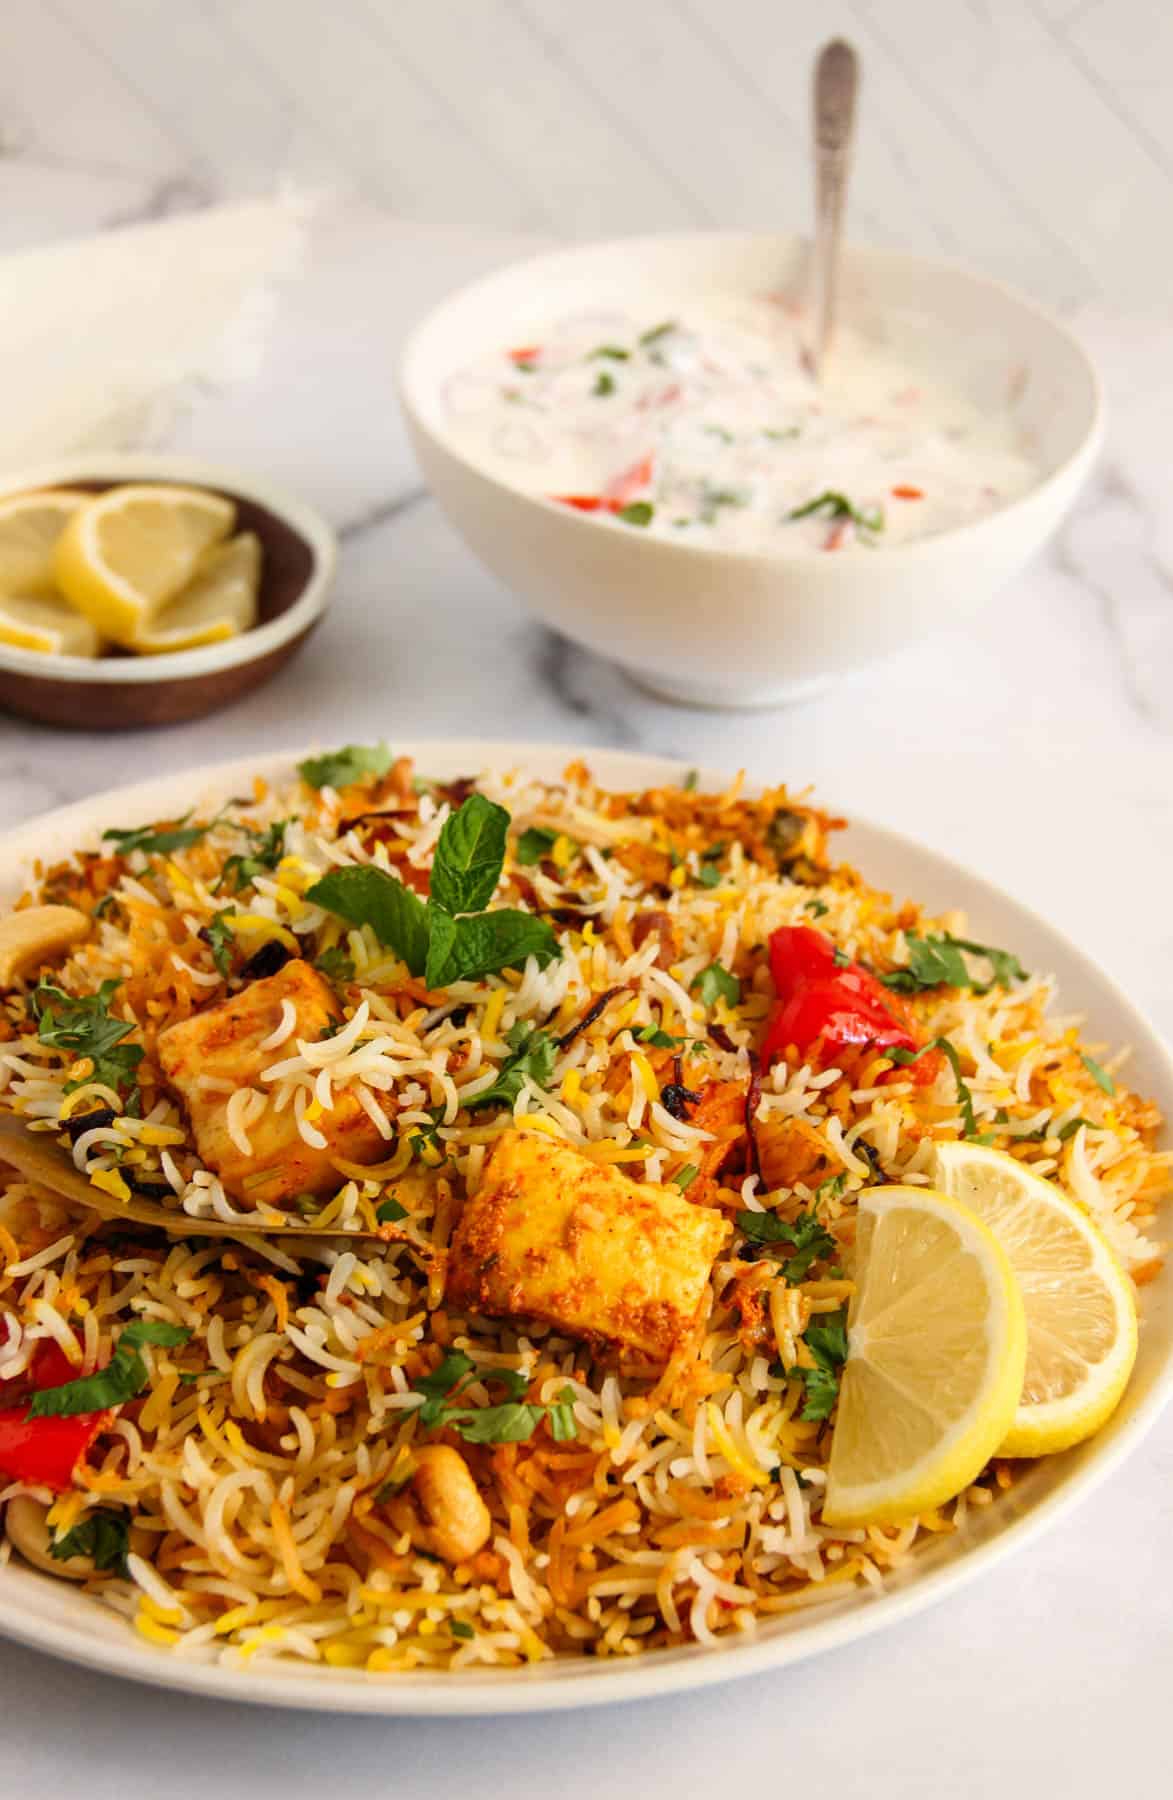
Serve Biryani with lemon wedges, Beet Raita, or Cucumber Raita.
When hosting friends and famil,y I love to pair Paneer Biryani with Mango Lassi, Parathas, Dal Makhani, and Gajar Halwa for a delicious Indian meal.
Tips to Make Perfect Biryani with Fluffy Rice
Biryani is a beloved and flavorful South Asian dish that can be a bit tricky to perfect, but with practice and attention to detail, you can make a delicious biryani. Here are some tips to help you make the perfect biryani:
- Choose the Right Rice: Use aged extra-long-grain Basmati rice, as it absorbs flavors well and doesn’t become mushy when cooked. Soak the rice for at least 20 minutes before cooking to ensure it cooks evenly.
- Choose the Right Pots: Unlike Instant Pots, which come in standard sizes, we all have different-sized pots and pans in our kitchen. Make sure you use a heavy-bottom casserole pot for cooking Biryani and use a saucepan that is big enough to parboil the rice with lots of water. For the proportions of Biryani in this recipe, a 4QT casserole and a 3QT saucepan work well. They will be about ¾th filled when the biryani is fully layered and when the rice is parboiled.
- Use Fresh Ingredients: Fresh and high-quality ingredients make a huge difference in the final taste of your biryani. This includes fresh spices, vegetables, and protein.
- Add Aromatics: Biryani is known for its aromatic spices and herbs. Use a combination of spices like cloves, cardamom, cinnamon, and bay leaves, and don’t forget fresh mint and coriander
- leaves. Layer them between the rice and meat/vegetables for a burst of flavor.
- Homemade Biryani Masala: Make your biryani masala from scratch. This gives you control over the flavors and allows you to adjust the spice level to your liking.
- Don’t Overcook the Rice: Parboil the rice before layering it. It should be only partially cooked (80%), as it will finish cooking when the biryani is “dum” cooked (slow-cooked in a sealed pot). Overcooked rice will become mushy.
- Seal the Pot: To ensure that the flavors are locked in, seal the pot with a tight-fitting lid and use aluminum foil to seal the edges. You can also place a heavy object on top of the lid to keep it sealed.
- Low and Slow Dum Cooking: Cook the biryani on low heat for the “dum” cooking process. This allows the flavors to meld together, and the rice to fully absorb the aromatic spices.
- Rest Before Serving: After the biryani is cooked, allow it to rest for 10 minutes before serving. This helps the flavors meld and the rice to firm up.
Recipe Video